I have to admit something. Until this week, I had never posted a finished project to Ravelry.As a designer, it feels so good to see pictures of projects I’ve designed posted by you. So I decided it was time for me to start posting my finished projects, too. I’ve documented the process below to help those of you, like me, who have never done it before.
Here goes…
1. Login (or sign up if you haven’t already) to Ravelry
2. On the homepage go to my notebook and click on projects.

2. Click add project.

3. Fill out the fields as best as you can…
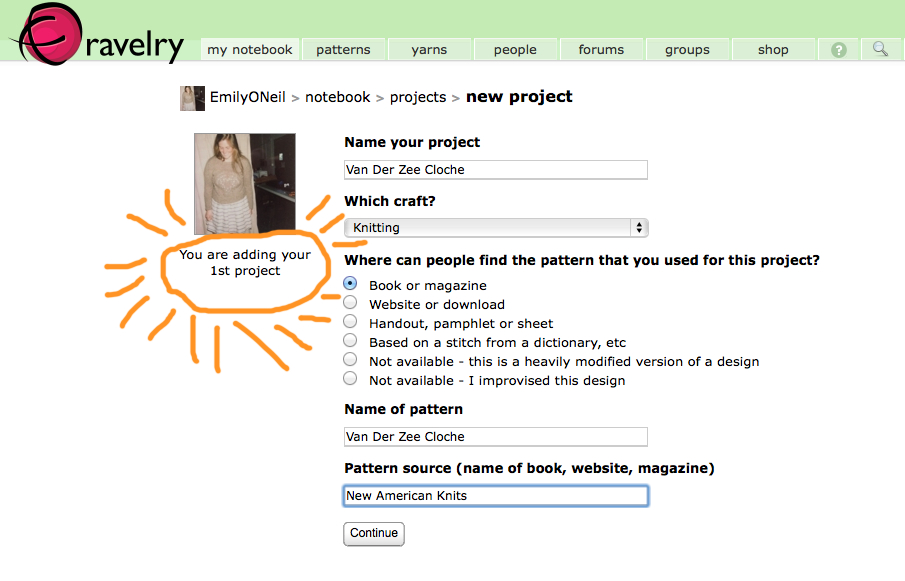
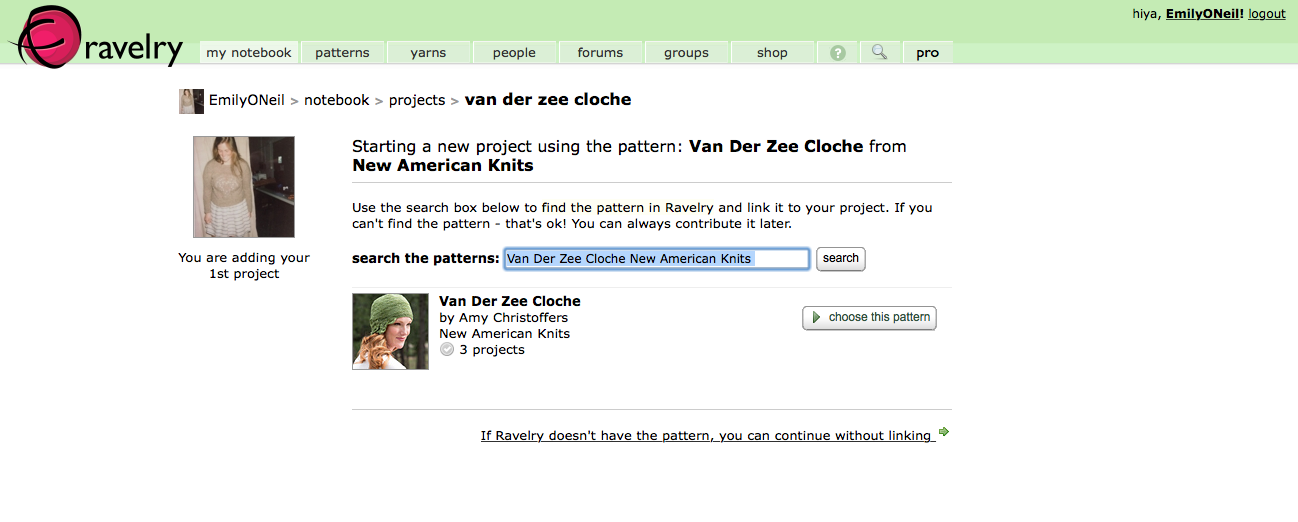
4. Ravelry recognizes the name of the pattern and directly links your project to the pattern page! Click choose this pattern.
5. The next page has lots of information to fill in – the name of your project, who it’s made for, needle size, yarn used, when it was completed, etc. You can also share your project with the groups you belong to. It’s a nice way to share your project and, if you share to the Berroco Lovers group, you could get picked for Amy’s Knitter Style feature!

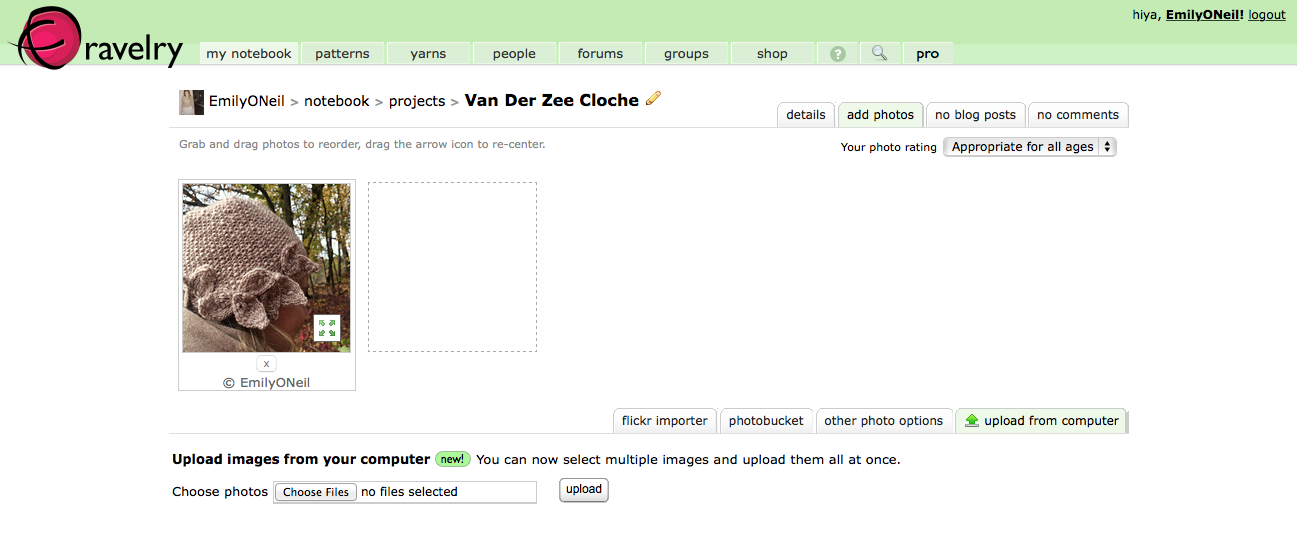
6. Don’t forget to click Save Changes at the bottom of the page. Then, most importantly, add photos!

7. Choose a file from your computer and click upload.
It’s really that easy! Now I need to start some new projects to post!
Happy making,
Emily

You can also add a project from the pattern’s Ravelry page by clicking Cast On below in Favorites on upper right side of page. This starts your project page with the pattern info already filled in so saves a step or two! HTH, MTknitter (Rav name)
Thanks! Great tip!
Reblogged this on G-Ma Ellen's Hands – Adventures in Crochet and Knit and commented:
Because I need to be more dedicated about posting my finished projects… Any thoughts?
Me too! It’s hard when you are so excited to just move onto the next project.