Nobody likes to do it. It can be one of the most depressing and unpleasant parts of a knitting project. But sometimes, you have to rip out your knitting.
At its most basic, ripping out is very easy. You just pull the needle out from inside your stitches and start unraveling the yarn. If you need to start over completely, this is all you need to do – just make sure to roll your unraveled yarn up into a nice, loose ball as you go along, so you won’t end up with a giant tangled mess after everything’s ripped out.
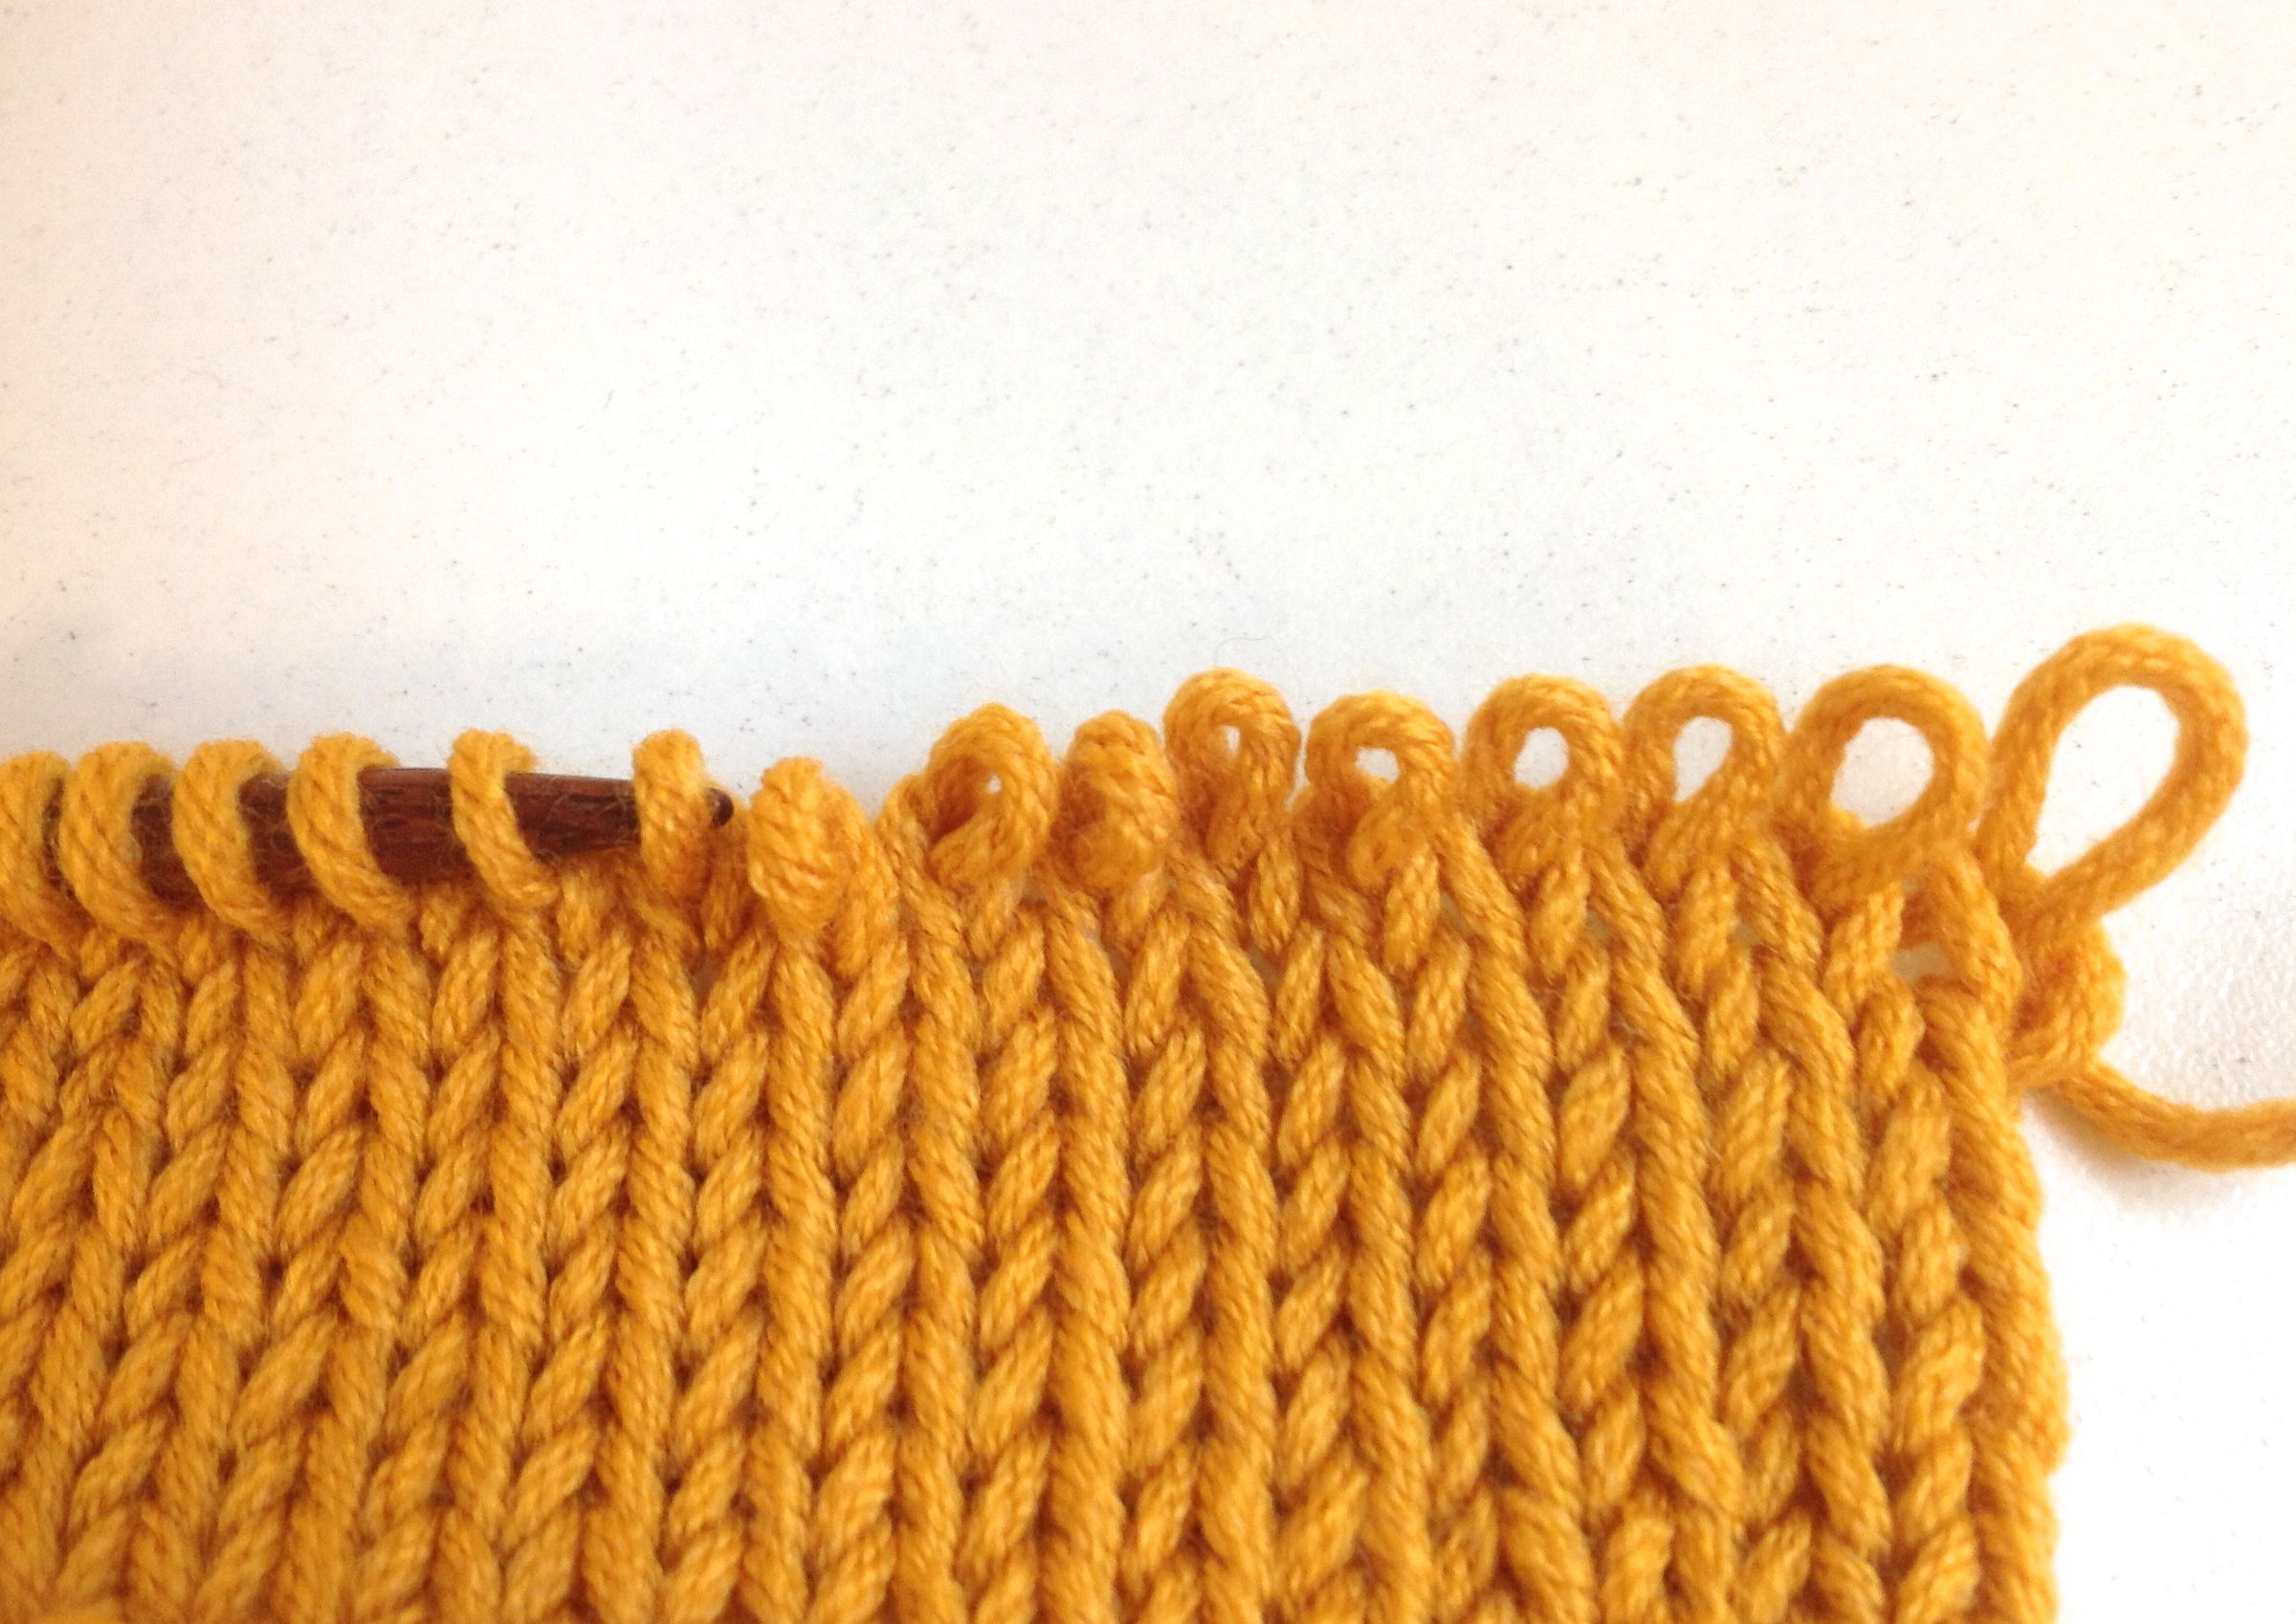
But what should you do if some of your knitting project is salvageable? If you only need to rip out a certain number of rows, that can pose a trickier problem. Unraveling is easy to start but not as easy to stop, however, there are some tricks that can help keep things under control. First, lay your knitting down on a flat surface so there’s no extra gravity pulling down on the stitches. Then, carefully unravel the knitting one row at a time, keeping an eye on the row where you’re planning to stop. Once you’ve undone the last row, grab your knitting needle and carefully insert it into the first loop on the side furthest from where the ball of yarn is attached. Work your way across the row, inserting the needle into each stitch (and making sure not to twist them).
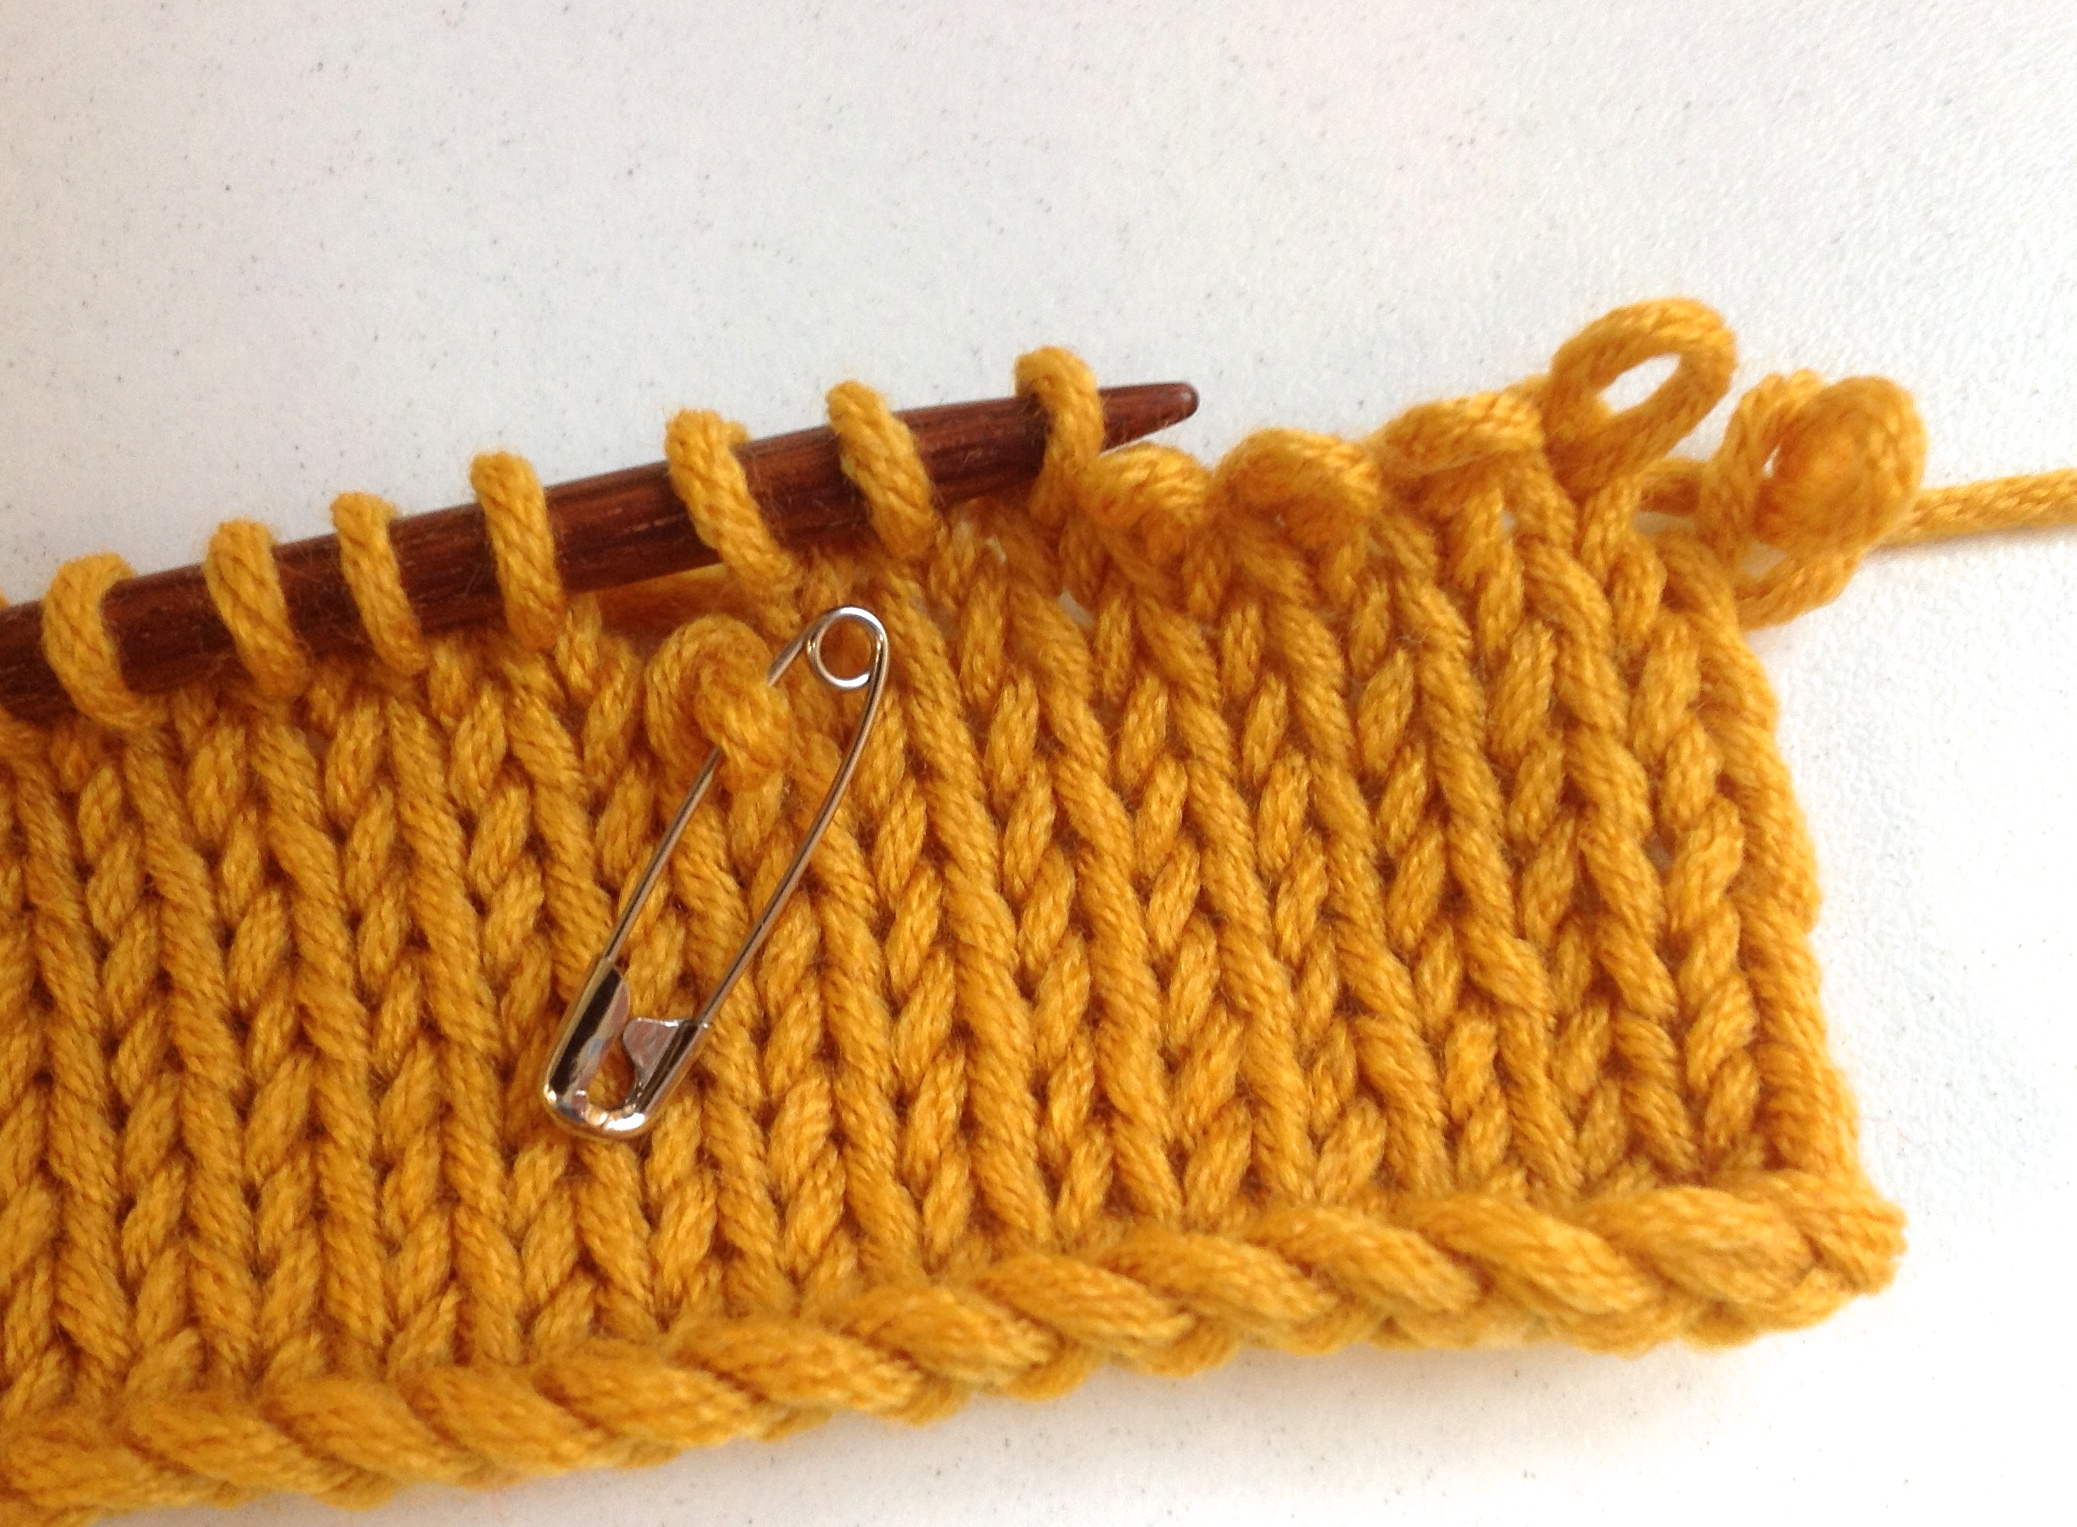
If you happen to drop a stitch along the way, you can secure it with a safety pin to remind yourself to pick it back up when you knit the next row. Once you’ve gotten all the stitches back on the needle, you’re ready to start knitting again.
When ripping out, it’s also important to keep in mind the type of fiber you’re using. Fuzzy fibers like wool tend to stick together, holding the stitches in place so that the fabric won’t start running after the needle is removed. I find wool yarns to be the easiest for ripping out, so that’s a good yarn to practice on. Mohair has a tendency to stick to itself like crazy, making ripping out a real challenge. On the other side of the spectrum, slippery fibers like bamboo are very slick, so it’s important to be patient and take your time while unraveling them, otherwise you could easily unravel too far very quickly.
One of the handiest knitting techniques for ripping out rows in a complicated project is using what’s called a lifeline. A lifeline is a strand of extra yarn (preferably in a contrasting color) that is threaded through the stitches of a particular row, preventing the stitches from unraveling past that point. Once the ripping out is done, you can simply transfer the stitches from the lifeline to your needle one at a time, without needing to wonder if you’ve dropped one accidentally.
You can either add the lifeline to a row while you work, or it can be added afterwards. If you’re anticipating a few tricky rows coming up, stop on the last row you know is correct and thread the yarn through all the stitches on the needle as in the photo below.
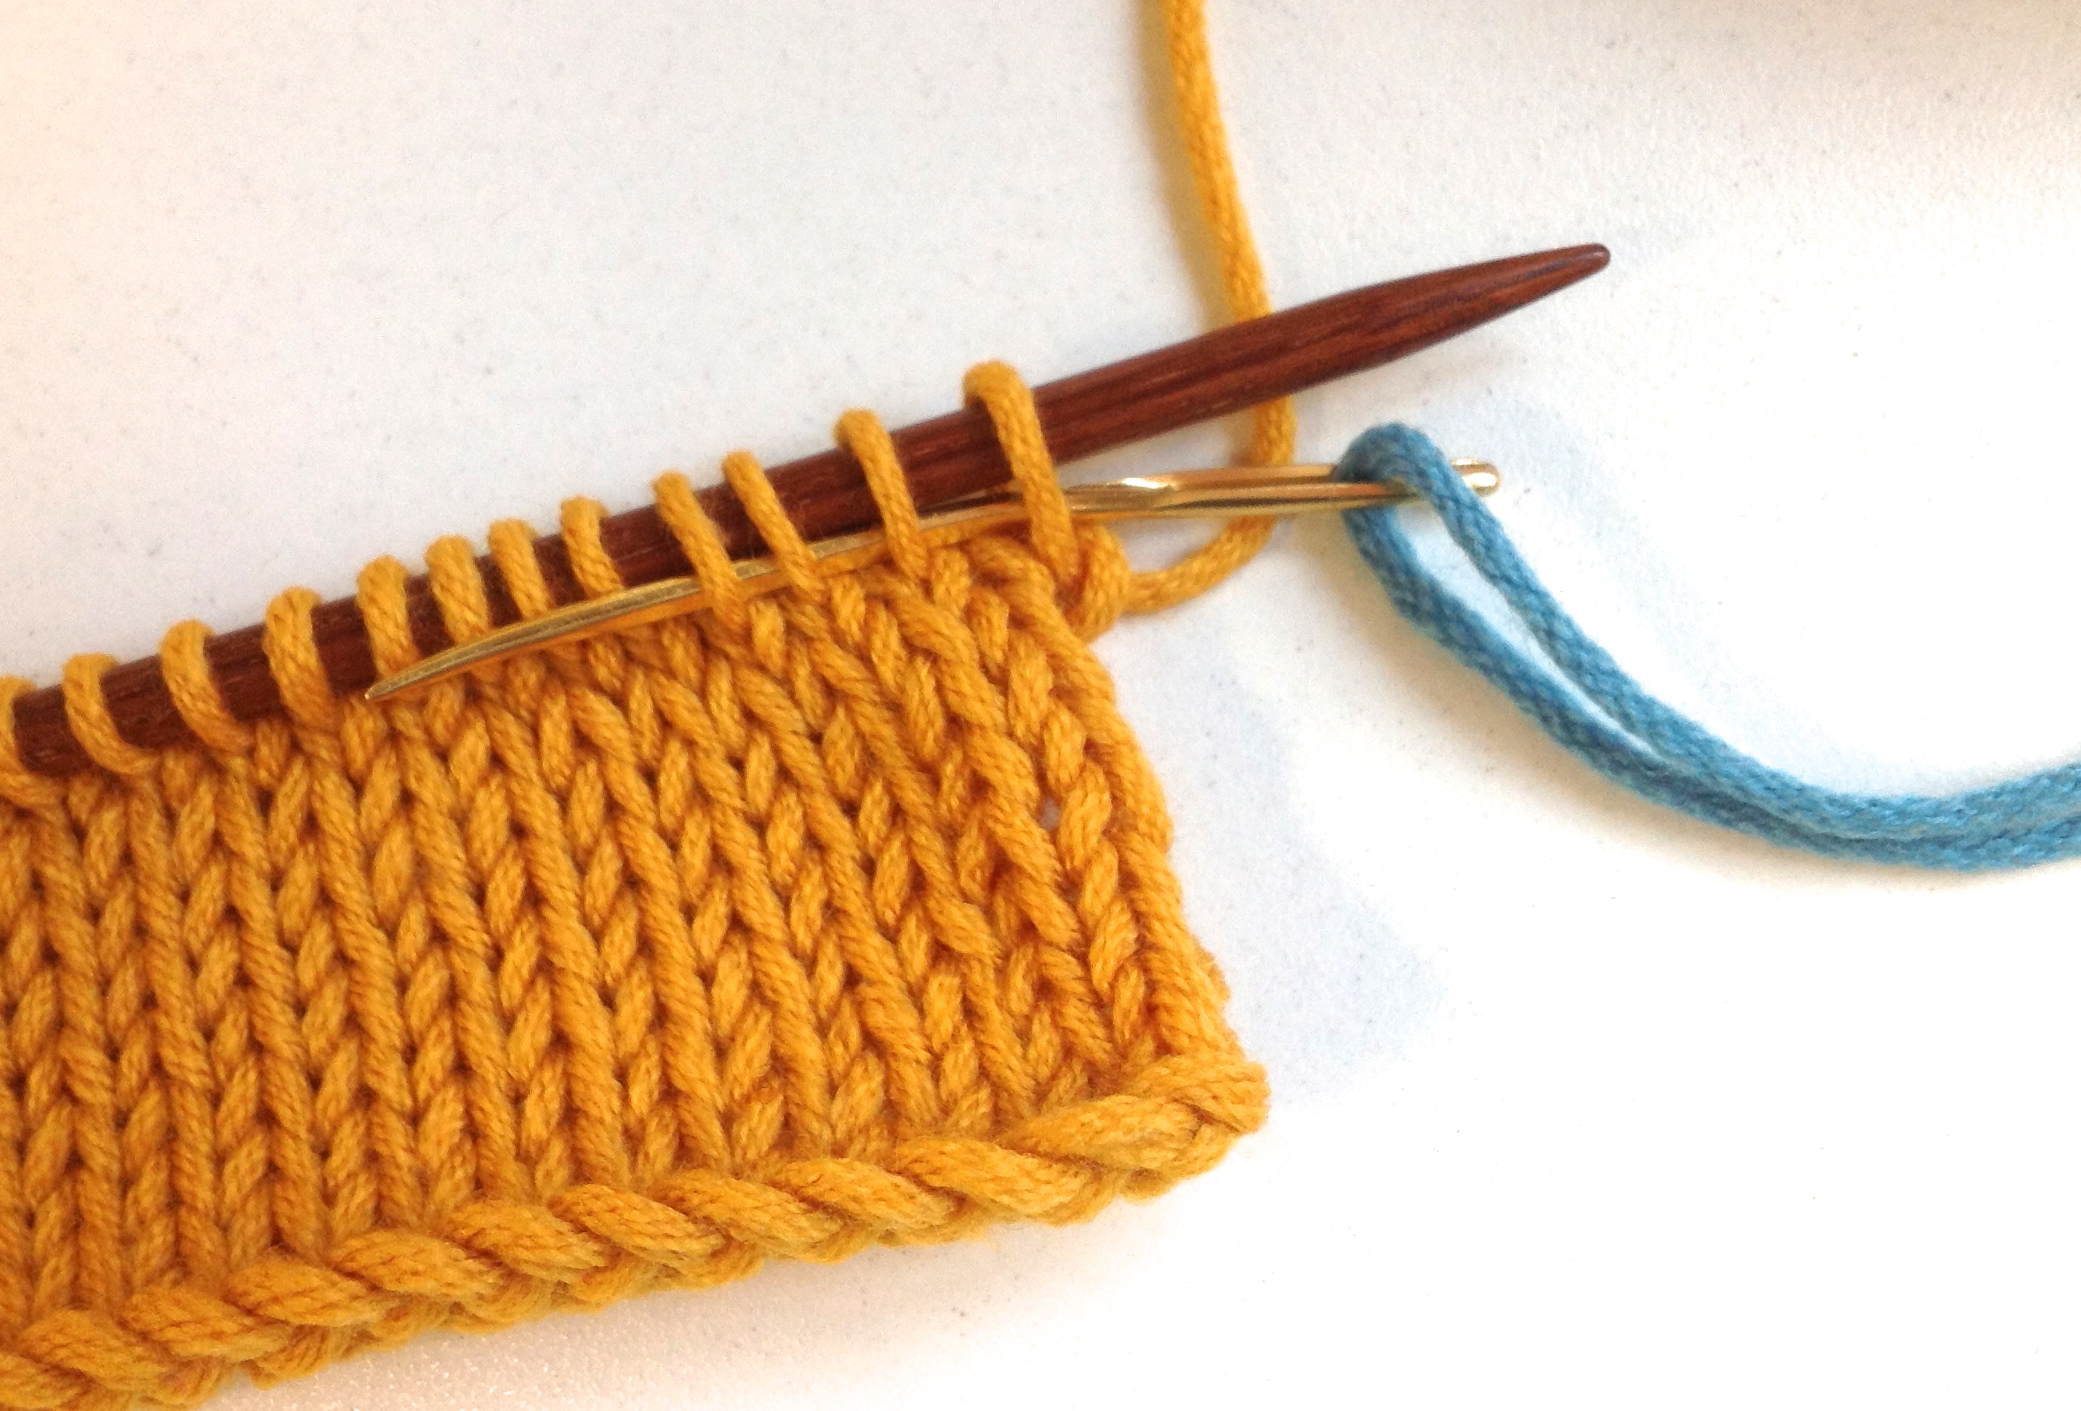
If you just realized that you’ll need to rip out, but didn’t anticipate the need for a lifeline, you can still put one in before starting to unravel. Use a tapestry needle to thread the yarn through the first leg of every stitch.

Ripping out can be an emotional process, but hopefully these tips and tricks can help keep things as easy and painless as possible!

Instead of using yarn for your afterthought lifeline, use a circular needle. Then the stitches don’t need to be picked up. They’re already on the cable of the needle.
Thanks for the tip, Susan!
Great tutorial. I agree with Susan, circular needles are great. I find that I can struggle with getting stitches off spare yarn, usually when I use it as a stitch holder and now tend to use my spare needle cables from my interchangables.
Really clear advise you have there and the photos are perfect. I’m sure that post will help many people!
Thanks so much – using the spare cables from your interchangeable needles is a great idea!
Thank you, thank you, thank you! I am doing a lace piece that is a little more complicated than I have attempted before – learning – and have already frogged the same six inches multiple times. Frustrating! This would have been a lifesaver. I will use one of my cables today before continuing. Maybe I can enjoy lace a little more now.
I hope this will help make your lace project easier! Let us know how it goes 🙂
Oh, my God. I can’t wait to tell my sister. She’s a new knitter and even thought I’ve been knitting for about 15 years now, I’ve NEVER hear of this. Thanks, Berrocco.
That’s great – I hope it will help!
So glad I found this blog post! As a new knitter I get confused trying to figure out when to stop pulling and making sure I don’t skip a loop. I’ve come across the lifeline topic on various sites but have still been unsure as to how to create one. Your instructions and photos are very basic, very clearly written and right on the money! Even if I am experienced in different types of crafts (i.e. cross-stitching) it is helpful, at least for me, for instructions to be written in a way that do not assume I have any of the skills required to perform a task. I am always in favor of having more information than too little.
Thanks – I’m so glad it’s helpful!
Thank you, thank you, thank you! Excellent ideas. Laying the work on a flat surface is such a great help. I knit prayer shawls and can’t believe how many times I drop a stitch! I have had to just start over a number of times. And, man, it IS heartbreaking. I appreciate your “life line” idea as well. Now, if I could just avoid dropping a stitch in the first place! LOL!
Thanks Linda, I’m happy that it helps!
Thankyou for the info, ripping out rows using the circular needles, I am using the circular needles right now and need to rip out several rows. I won’t want to forget this grand idea. thanks again. Dorothy
Thanks Dorothy!
I’ve been knitting the back of a sweater, bottom to top, for quite some time now and now. As I look back, I’m thinking I would prefer if the bottom edge started with a basic rib. Is there a way to rip stitches from the beginning of the work, where I started? Is it the same process, just upside down, or is it more complicated than that? Thank you!
Hi! I could have sworn I’ve been to this blog before but after reading through some of the
post I realized it’s new to me. Anyhow, I’m definitely
happy I found it and I’ll be book-marking and checking back often!
Does anyone have a pattern for a scarf that you knit in such a way that you only knit for about a foot and a half, cast off, then pull on the two ends and the scarf pulls out so it is double the length but also is double thickness? I knit one for my mother-in-law many years ago and cannot find the pattern again.
Hi Catherine! Sounds like a pretty fabulous pattern, but unfortunately the design team and I do not believe it is one from the Berroco archive. Try searching on a Ravelry forum perhaps? Good Luck!
So grateful for the various tips. I must take out half of the top in a raglan sweater done in the round. When it was ready to block I saw some galring errors and decided to take it out and go again. You all have been a HUGE help!
Please tell me how I can rip out from the beginning of my project. I just finished a poncho with a cowl neck and the cowl is too long! HELP!
Please email patternsupport@berroco.com with questions about specific projects.
This has been a great read for me and I am sure many others will love it as well, Thanks for your efforts here.