Until recently, I hadn’t knitted my garments from patterns. I created by pulling garments from my closet, using tracing paper to trace the shapes, knitting swatches, finding my gauge, measuring, and finally beginning to knit the shapes.
For four years I created this way, in both machine and hand knitting, making as many garments as I could. Many were borderline disastrous, but I think that we need those disasters to learn from all of the mistakes, right?! Eventually I felt brave enough to be more experimental with my shapes and my garments began to really fit!
I was now ready to try a new challenge – knitting patterns that someone else designed. For my first attempt I chose a soft pink lacy cardigan. I was so excited. I was knitting along with no problems at all…until I got to the increase term M1. This may sound funny, I had never heard of that term before! I had to look it up to discover that M1 stands for Make 1.
If your process was anything like mine, you may also be confused about what to do when your pattern asks you to increase. Now that I know what to do when I come across M1 in a pattern, I can fill you in on this trick of the trade:
With my left hand needle tip, I lift through the front of the horizontal strand, keeping this on my left hand needle. Then I knit through this stitch! (Or purl depending on what the pattern asks for).
Some increases will be more difficult than others. Take Retta from booklet #336, for example.
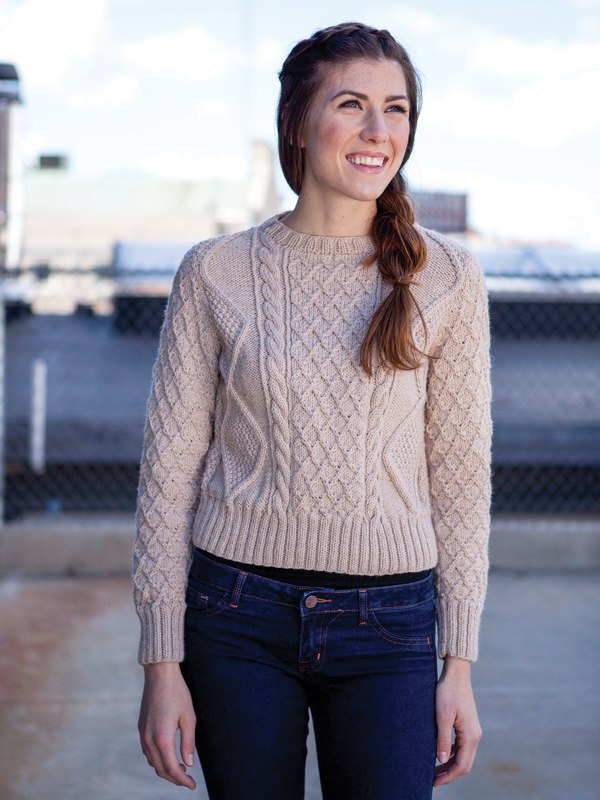
In this pattern, the M1 occurs in the increasing of the sleeves with a textural stitch pattern. At first glance this is a bit confusing (well, I was confused). What happens to these extra stitches that don’t quite form a full repeat? Don’t worry! It will work itself out!
The increase row in the pattern reads “K1, M1k, work to last st, M1k, K1 – Repeat this increase __ number of times more, working incs into Chart B (illustrated in pattern book ) as sts become available.” The sleeves are worked flat and the increases occur just after the beginning and just before the end of the edges.
As you are increasing, you knit the increased stitches in stockinette until you have enough to work a full repeat of stitch pattern.
(the yellow line indicates where the sleeve has been seamed)
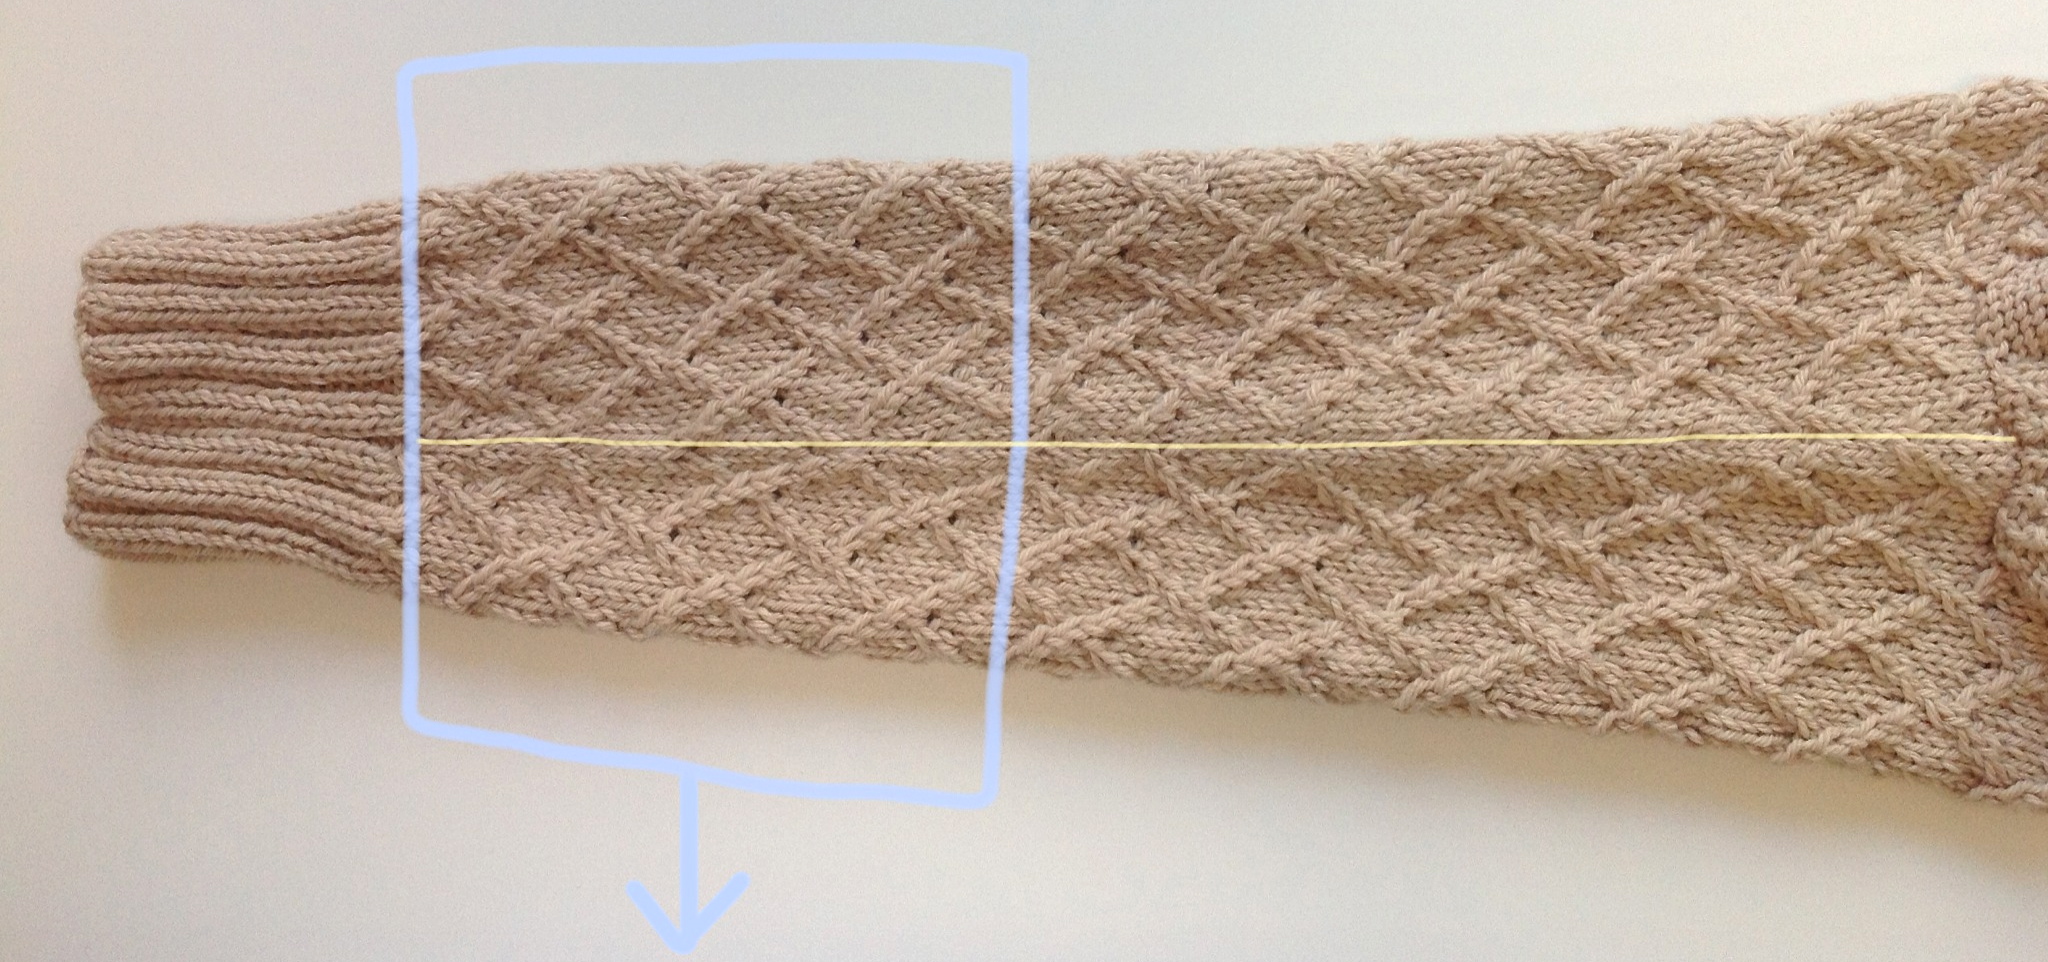
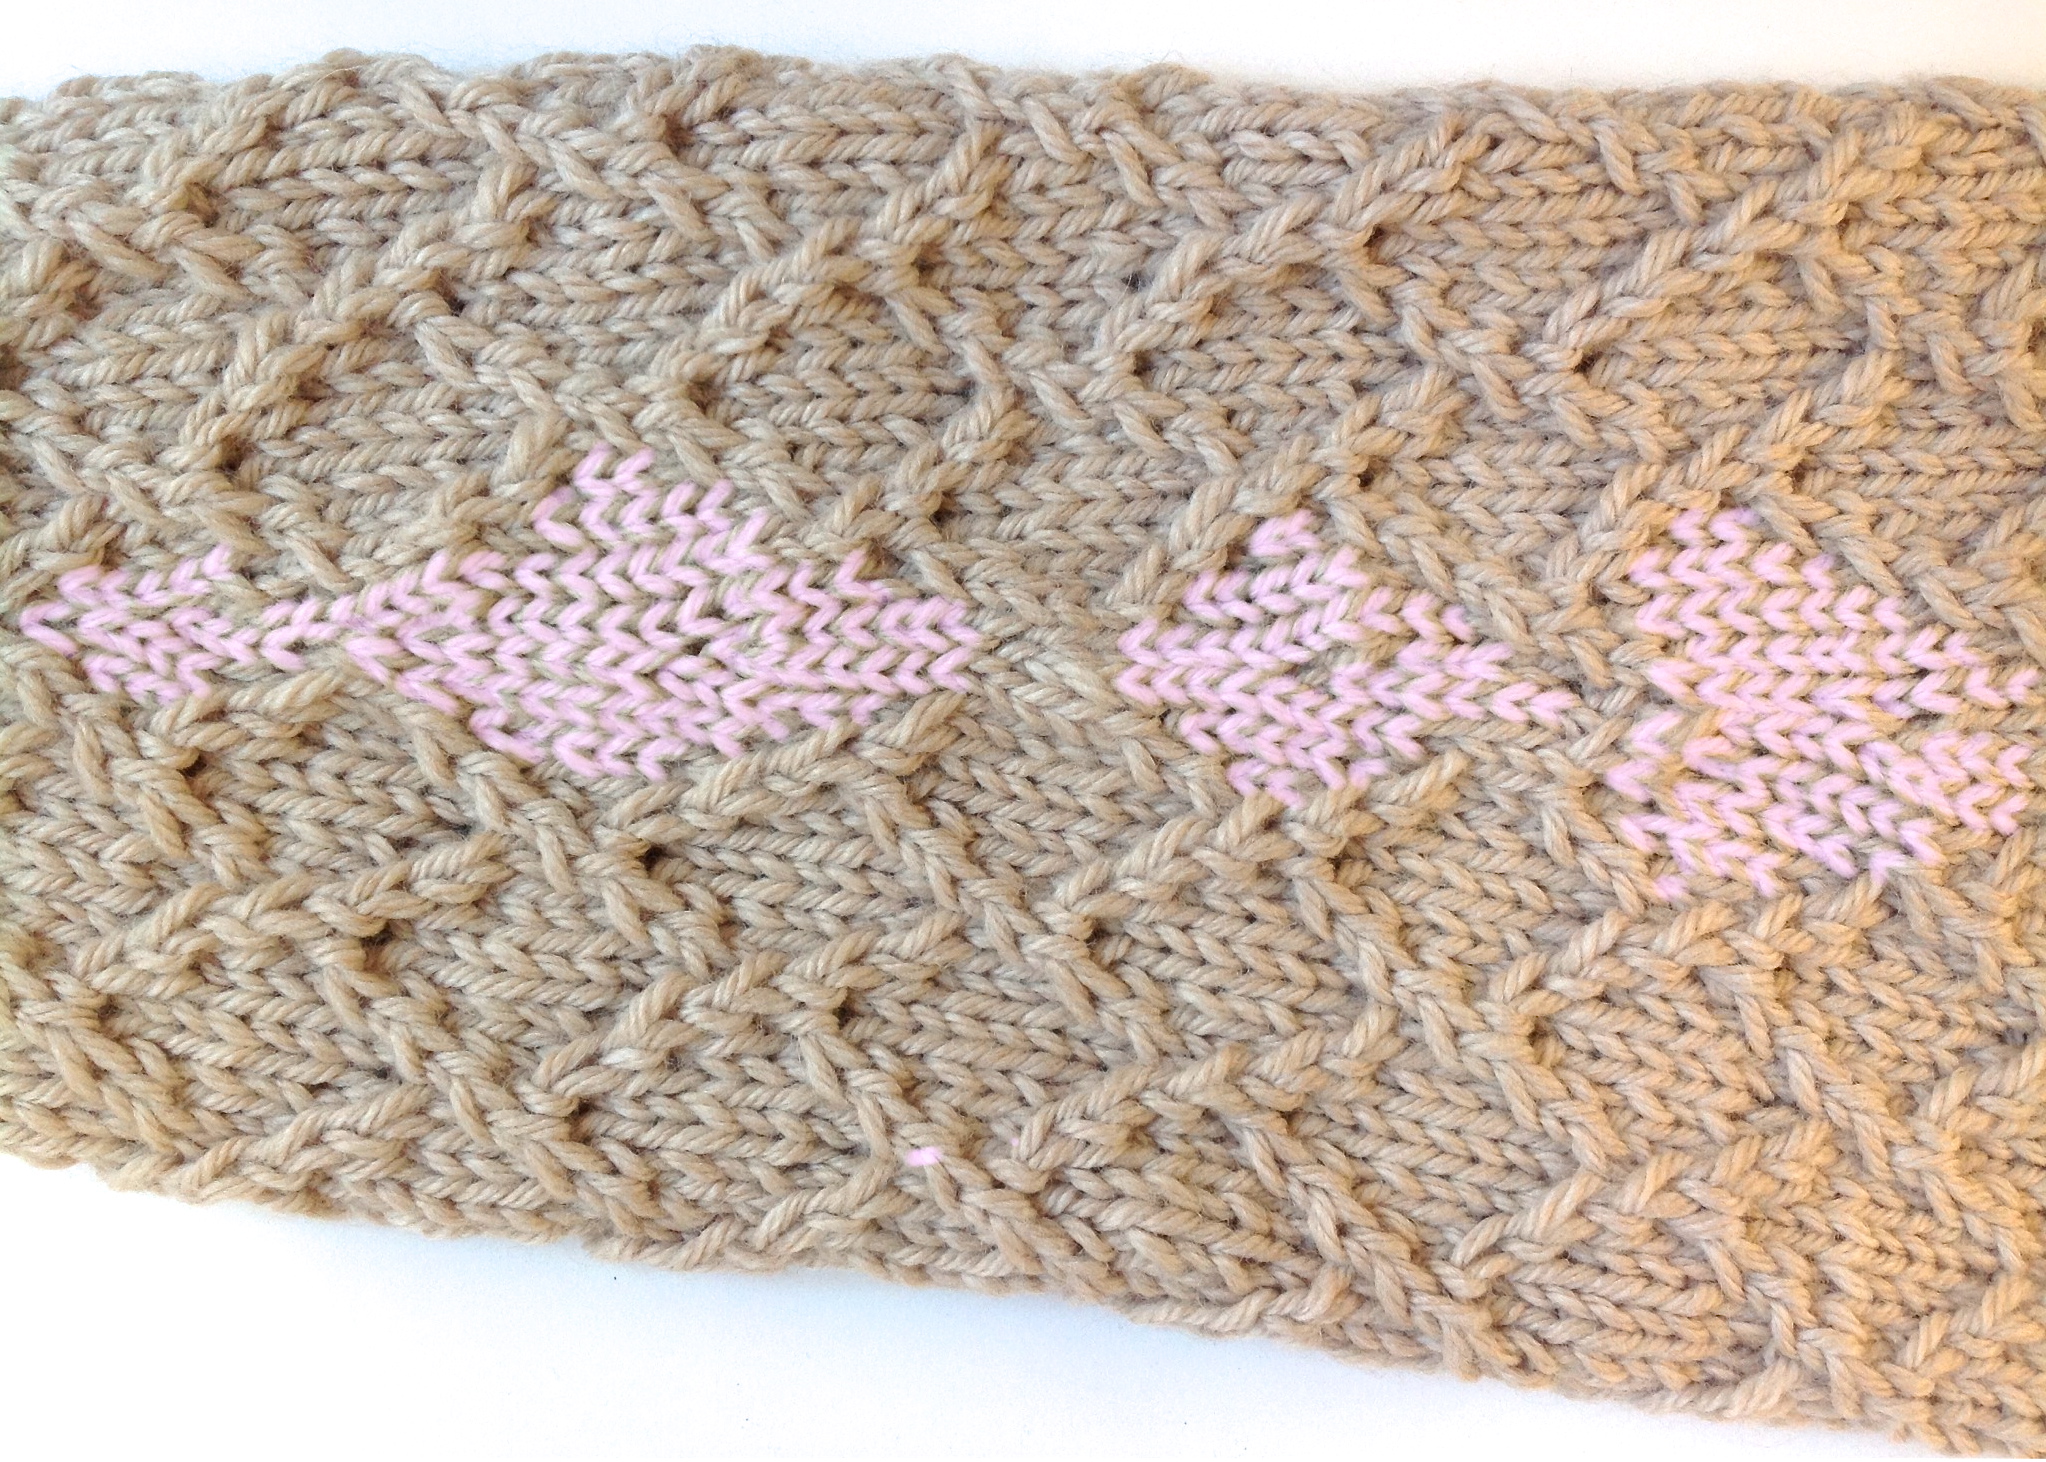
You can see that the patches of stitches that are colored are not quite following the all over stitch pattern of the rest of the sleeve. You only begin to work the stitches in pattern when you have increased enough to make a full repeat. Until then you just knit stockinette.
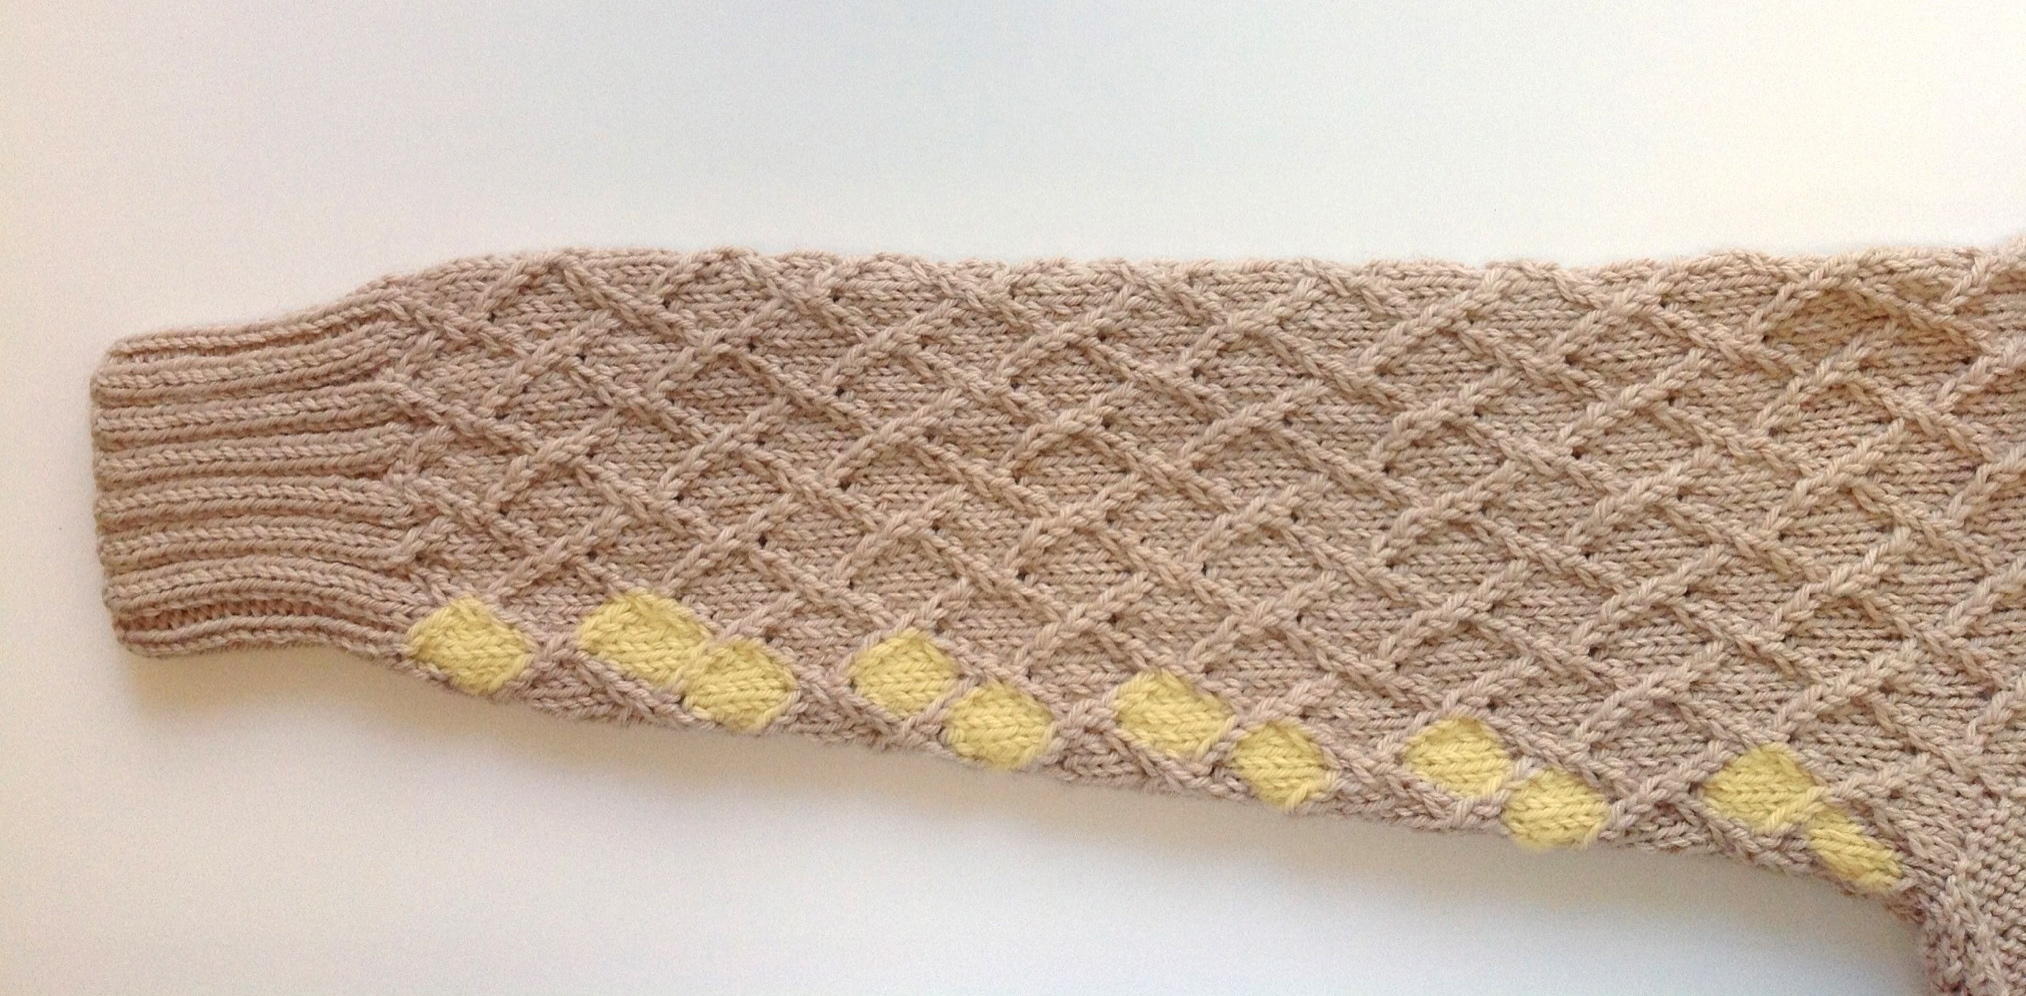
Here is the sleeve laid flat. You can see that gradually more rows of diamonds are formed as you increase.
I hope that this helps explain increases in pattern a little more and that you won’t be afraid to take on new knitting challenges.
Happy Knitting!
Emily

Thank you Emily. That does clarify a confusing process.
Thanks Phoebe !!
In the book #296 Berroco Weekend, the vest AON has these instructions on the Inc Row for the back: K2, M1k, k to last 2 sts, M1k, k2. But wouldn’t the first M1 be a M1R and the last M1 a M1L?