When I first started knitting, I made only scarves and I never used a pattern. In an effort to expand my knitting horizons, my mom bought me a pattern for a hat, along with the recommended yarn. It was a pretty simple pattern so it wasn’t too hard to decipher, until I got to the last part:
“Cut yarn leaving an 8” long end. Draw end through all sts on needle, then pull up tightly and secure. Fasten off.”
I had a general idea of what was supposed to be happening, but the directions struck me as frighteningly vague. I muddled through and used my best judgment, and the top of the hat looked pretty decent. If you happen to be facing an instance of fastening off in your knitting future, have no fear (maybe you’re knitting one of our hat patterns, like Norwich at the above left). I have documented the steps below using Peruvia Quick (with a version of a hat small enough for a doll to wear!):

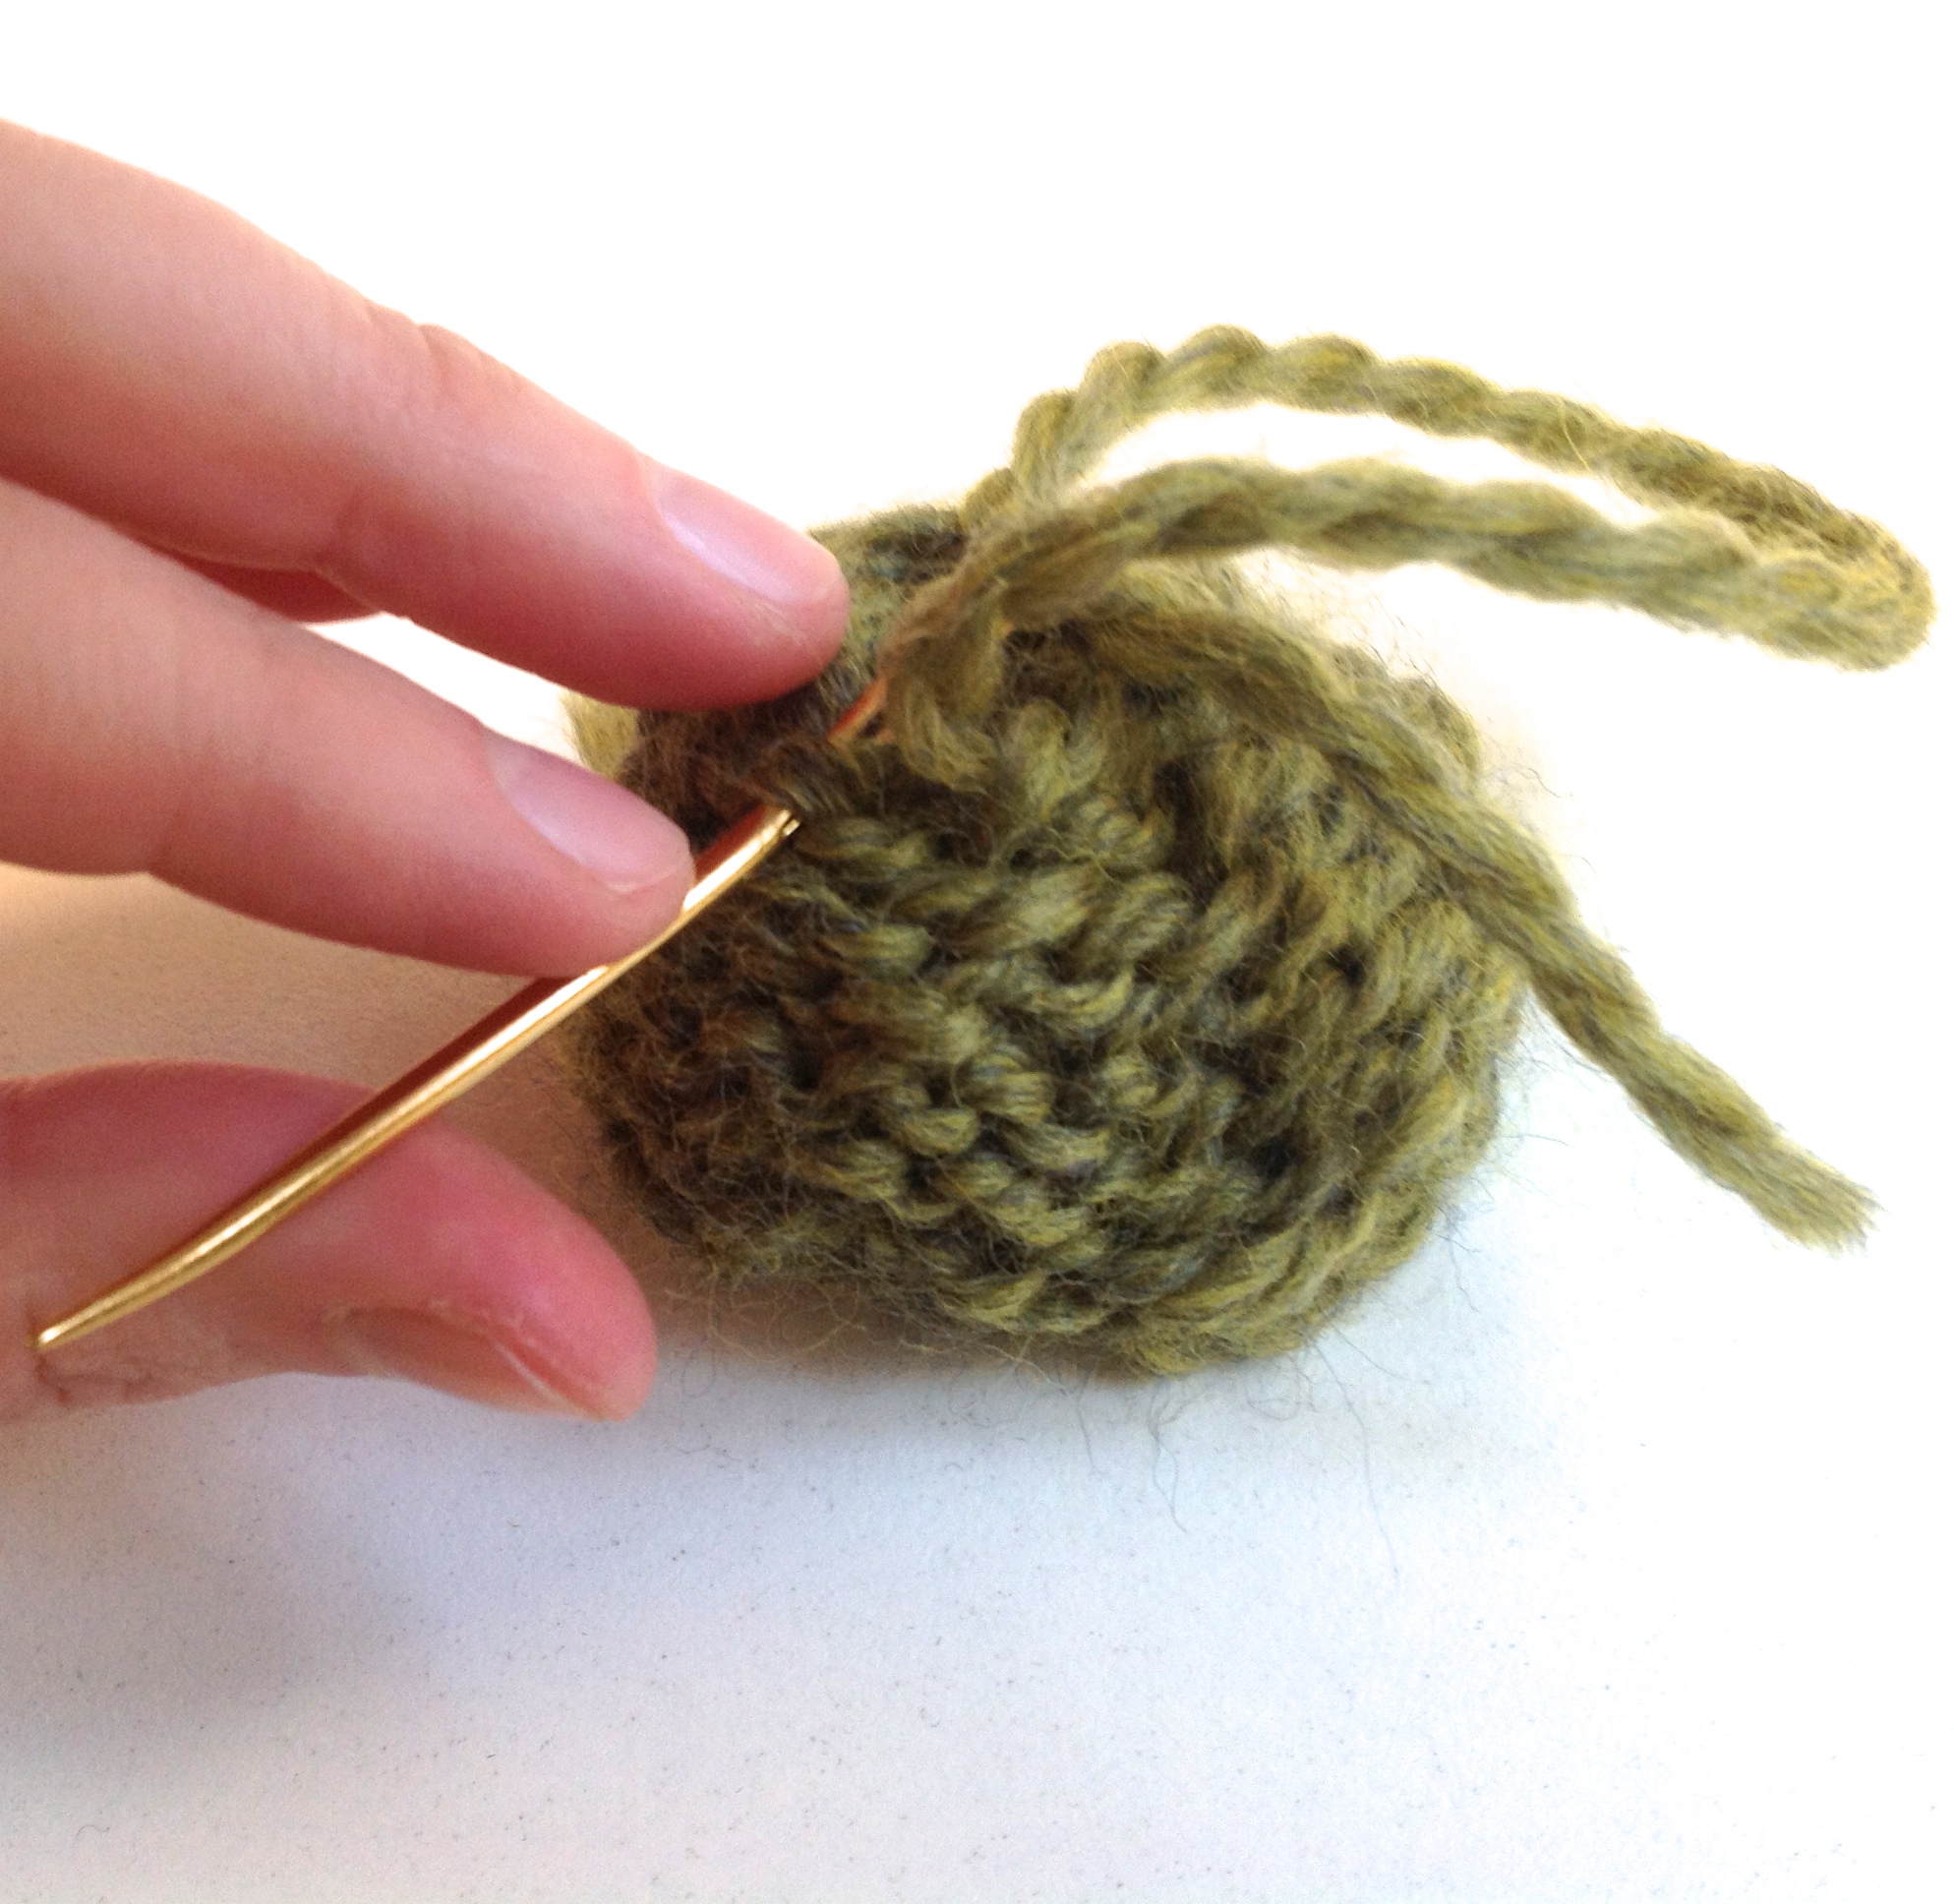
Step 1: Use a yarn needle to draw the end through all the loops still on the needle.

Step 2: After I’ve drawn the tail through all of the loops, I like to run it through the first two stitches again, to really secure the circle.

Step 3: Use the tail like a drawstring and cinch the stitches up as tightly as you can.

Step 4: Poke the needle between two nearby stitches and pull the tail to the inside of the hat.
Step 5: Weave the tail in through the loops on the wrong side.
That’s all there is to it! In addition to hats, this technique is also helpful for both the thumbs and tops of mittens.

Thank you for simplifying this!
Thanks Eve, I’m glad that it helps!
this helped me thank you
Yay! I am so glad it helped!
Very helpful! Many thanks!!